Showing posts with label Technology. Show all posts

Customizing Blogger/Blogspot - Final touches

This is the final post of this series. The next steps are to:
  • hide the toolbar at the top
  • remove the dotted lines
  • close the margins between the panels

Hiding the toolbar is pretty easy. Just add this to the end of your b:skin section:
#navbar { display: none; }

Removing the dotted lines isn't too difficult either. We just have to reduce the dotted border width to 0 pixels. Simply look for all instances of the word dotted. If you see:
border: 1px dotted...
Change it to:
border: 0px dotted...
And if within the same block, you see:
border-width: 1px...;
Change it to:
border-width: 0px;

Lastly, closing the margins. This is trickier as you have to do this pretty much by trial and error. Go through all the sections and tweak the margins and paddings. For the sake of brevity, I will include my entire style section here:
body {
background:$bodyBgColor;
margin:0;
text-align:center;
line-height: 1.5em;
font:x-small Trebuchet MS, Verdana, Arial, Sans-serif;
color:$mainTextColor;
font-size/* */:/**/small;
font-size: /**/small;
}


/* Page Structure
----------------------------------------------- */
/* The images which help create rounded corners depend on the
following widths and measurements. If you want to change
these measurements, the images will also need to change.
*/
#outer-wrapper {
width:1000px;
margin:0 auto;
text-align:$startSide;
font: $bodyFont;
background: $topSidebarBgColor;
}
#main-wrap1 {
width:700px;
float:$startSide;
background:$mainBgColor;
margin:0;
padding:15px 0 10px;
color:$mainTextColor;
font-size:97%;
line-height:1.5em;
word-wrap: break-word;
overflow: hidden;
}
#main-wrap2 {
float:$startSide;
width:100%;
padding:10px 0 0;
}
#main {
padding:0;
width:680px;
}
#sidebar-wrap {
width:300px;
float:$endSide;
margin:15px 0 0;
font-size:97%;
line-height:1.5em;
word-wrap: break-word;
overflow: hidden;
}

.main .widget {
margin-top: 4px;
width: 680px;
padding: 0 13px;
}

.main .Blog {
margin: 0;
padding: 0;
width: 680px;
}

.inline-ad {
padding-left: 19px; padding-bottom: 20px;
margin-left: 20px; margin-bottom: 20px; margin-right: 20px;
border: 1px dotted $borderColor;
border-width: 0px 0px 1px 0px;
}

/* Links
----------------------------------------------- */
a:link {
color: $mainLinkColor;
}
a:visited {
color: $mainVisitedLinkColor;
}
a:hover {
color: $mainVisitedLinkColor;
}
a img {
border-width:0;
}


/* Blog Header
----------------------------------------------- */
#header-wrapper {
background:$titleBgColor;
margin-top:0px;
margin-$endSide:0;
margin-bottom:0;
margin-$startSide:0;
padding-top:0;
padding-$endSide:0;
padding-bottom:0;
padding-$startSide:0;
color:$titleTextColor;

}
#header {
padding:0; margin: 0;
height: 300px; width: 1000px;
background: url('BANNER URL') no-repeat left top;
}
#header h1 {
margin:0;
padding:90px 500px 30px 30px;
line-height:1.2em;
font: $pageTitleFont;
}
#header a,
#header a:visited {
text-decoration:none;
color: $titleTextColor;
}
#header .description {
margin:0;
padding: 5px 500px 10px 30px;
line-height:1.5em;
font: $descriptionFont;
}


/* Posts
----------------------------------------------- */
h2.date-header {
margin-top:0;
margin-$endSide:28px;
margin-bottom:0;
margin-$startSide:43px;
font-size:85%;
line-height:2em;
text-transform:uppercase;
letter-spacing:.2em;
color:$dateHeaderColor;
}
.post {
margin:.3em 0 25px;
padding:0 13px;
border:0px dotted $borderColor;
}
.post h3 {
margin:0;
line-height:1.5em;
background:
url("http://www2.blogblog.com/rounders/icon_arrow.gif")
no-repeat 10px .5em;
display:block;
border:0px dotted $borderColor;
border-width:0px;
padding-top:2px;
padding-$endSide:14px;
padding-bottom:2px;
padding-$startSide:29px;
color: $postTitleColor;
font: $postTitleFont;
}
.post h3 a, .post h3 a:visited {
text-decoration:none;
color: $postTitleColor;
}
a.title-link:hover {
background-color: $borderColor;
color: $mainTextColor;
}
.post-body {
border:0px dotted $borderColor;
border-width:0px;
border-bottom-color:$mainBgColor;
padding-top:10px;
padding-$endSide:14px;
padding-bottom:1px;
padding-$startSide:29px;
}
html>body .post-body {
border-bottom-width:0;
}
.post-body {
margin:0 0 .75em;
}
.post-body blockquote {
line-height:1.3em;
}
.post-footer {
/* background: #ded; */
margin:0;
padding-top:14px;
padding-$endSide:14px;
padding-bottom:15px;
padding-$startSide:29px;
border:0px dotted $borderColor;
border-width: 0px;
font-size:100%;
line-height:1.5em;
color: #666;
}
/*
The first line of the post footer might only have floated text,
so we need to give it a height. The height comes from the post-
footer line-height
*/
.post-footer-line-1 {
min-height:1.5em;
_height:1.5em;
}

.post-footer p {
margin: 0;
}

html>body .post-footer {
border-bottom-color:transparent;
}

.uncustomized-post-template .post-footer {
text-align: $endSide;
}

.uncustomized-post-template .post-author,
.uncustomized-post-template .post-timestamp {
display: block;
float: $startSide;
text-align:$startSide;
margin-$endSide: 4px;
}

.post-footer a {
color: #258;
}
.post-footer a:hover {
color: #666;
}
a.comment-link {
/* IE5.0/Win doesn't apply padding to inline elements,
so we hide these two declarations from it */
background/* */:/**/url("http://www.blogblog.com/rounders/icon_comment_$startSide.gif") no-repeat $startSide 45%;
padding-$startSide:14px;
}
html>body a.comment-link {
/* Respecified, for IE5/Mac's benefit */
background:url("http://www.blogblog.com/rounders/icon_comment_$startSide.gif") no-repeat $startSide 45%;
padding-$startSide:14px;
}
.post img, table.tr-caption-container {
margin-top:0;
margin-$endSide:0;
margin-bottom:5px;
margin-$startSide:0;
padding:4px;
border:1px solid $borderColor;
}
.tr-caption-container img {
border: none;
margin: 0;
padding: 0;
}
blockquote {
margin:.75em 0;
border:1px dotted $borderColor;
border-width:1px 0;
padding:5px 15px;
color: $dateHeaderColor;
}
.post blockquote p {
margin:.5em 0;
}

#blog-pager-newer-link {
float: $startSide;
margin-$startSide: 13px;
}

#blog-pager-older-link {
float: $endSide;
margin-$endSide: 13px;
}

#blog-pager {
text-align: center;
}

.feed-links {
clear: both;
line-height: 2.5em;
margin-$startSide: 13px;
}

/* Comments
----------------------------------------------- */
#comments {
margin:-25px 13px 0;
border:1px dotted $borderColor;
border-width:0px;
padding-top:20px;
padding-$endSide:0;
padding-bottom:15px;
padding-$startSide:0;
}
#comments h4 {
margin:0 0 10px;
padding-top:0;
padding-$endSide:14px;
padding-bottom:2px;
padding-$startSide:29px;
border-bottom:0px dotted $borderColor;
font-size:120%;
line-height:1.4em;
color:$postTitleColor;
}
#comments-block {
margin-top:0;
margin-$endSide:15px;
margin-bottom:0;
margin-$startSide:9px;
}
.comment-author {
background:url("http://www.blogblog.com/rounders/icon_comment_$startSide.gif") no-repeat 2px .3em;
margin:.5em 0;
padding-top:0;
padding-$endSide:0;
padding-bottom:0;
padding-$startSide:20px;
font-weight:bold;
}
.comment-body {
margin:0 0 1.25em;
padding-top:0;
padding-$endSide:0;
padding-bottom:0;
padding-$startSide:20px;
}
.comment-body p {
margin:0 0 .5em;
}
.comment-footer {
margin:0 0 .5em;
padding-top:0;
padding-$endSide:0;
padding-bottom:.75em;
padding-$startSide:20px;
}
.comment-footer a:link {
color: #333;
}
.deleted-comment {
font-style:italic;
color:gray;
}
.comment-form {
padding-$startSide:20px;
padding-$endSide:5px;
}
#comments .comment-form h4 {
padding-$startSide:0px;
}

/* Profile
----------------------------------------------- */
.profile-img {
float: $startSide;
margin-top: 5px;
margin-$endSide: 10px;
margin-bottom: 5px;
margin-$startSide: 0;
border: 1px solid $topSidebarTextColor;
}

.profile-datablock {
margin-top:0;
margin-$endSide:15px;
margin-bottom:.5em;
margin-$startSide:0;
padding-top:8px;
}

.profile-link {
background:url("http://www.blogblog.com/rounders/icon_profile_$startSide.gif") no-repeat $startSide .1em;
padding-$startSide:15px;
font-weight:bold;
display: none;
}

.profile-textblock {
clear: both;
margin: 0;
}

.sidebar .clear, .main .widget .clear {
clear: both;
}

#sidebartop-wrap {
background:$topSidebarBgColor;
margin:0px 0px 15px;
padding:0px 0px 10px;
color:$topSidebarTextColor;
}

#sidebartop-wrap2 {
padding: 10px 0 0;
margin:0;
border-width:0;
}

#sidebartop h2 {
line-height:1.5em;
color:$topSidebarHeaderColor;
border-bottom: 0px dotted $topSidebarHeaderColor;
margin-bottom: 0.5em;
font: $headerFont;
}

#sidebartop a {
color: $topSidebarLinkColor;
}

#sidebartop a:hover {
color: $topSidebarVisitedLinkColor;
}
#sidebartop a:visited {
color: $topSidebarVisitedLinkColor;
}
/* Sidebar Boxes
----------------------------------------------- */

.sidebar .widget {
margin:.5em 13px 1.25em;
padding:0 0px;
}

.widget-content {
margin-top: 0.5em;
}

#sidebarbottom-wrap1 {
background: $topSidebarBgColor;
margin:0 0 15px;
padding:10px 0 0;
color: $mainTextColor;
}

#sidebarbottom-wrap2 {
padding:0 0 8px;
}

.sidebar h2 {
margin:0;
padding:0 0 .2em;
line-height:1.5em;
font:$headerFont;
}

.sidebar ul {
list-style:none;
margin:0 0 1.25em;
padding:0;
}

.sidebar ul li {
background:url("http://www2.blogblog.com/rounders/icon_arrow_sm.gif") no-repeat 2px .25em;
margin:0;
padding-top:0;
padding-$endSide:0;
padding-bottom:3px;
padding-$startSide:16px;
margin-bottom:3px;
border-bottom:0px dotted $borderColor;
line-height:1.4em;
}
.sidebar p {
margin:0 0 .6em;
}

#sidebar h2 {
color: $postTitleColor;
border-bottom: 0px dotted $postTitleColor;
}

/* Footer
----------------------------------------------- */
#footer-wrap1 {
clear:both;
margin:0 0 10px;
padding:15px 0 0;
}
#footer-wrap2 {
background:$titleBgColor;
color:$footerTextColor;
}
#footer {
padding:8px 15px;
}
#footer hr {display:none;}
#footer p {margin:0;}
#footer a {color:$footerTextColor;}
#footer .widget-content {
margin:0;
}
#custom-footer {
color:$footerTextColor;
text-align: center;
}
#custom-footer a {
color:$footerTextColor;
text-decoration: none;
}

/** Page structure tweaks for layout editor wireframe */
body#layout #main-wrap1,
body#layout #sidebar-wrap,
body#layout #header-wrapper {
margin-top: 0;
}

body#layout #header, body#layout #header-wrapper,
body#layout #outer-wrapper {
margin-$startSide:0,
margin-$endSide: 0;
padding: 0;
}

body#layout #outer-wrapper {
width: 730px;
}

body#layout #footer-wrap1 {
padding-top: 0;
}

#navbar {
display: none;
}


Special credit goes to the Blogger team for the original Rounders template.

Customizing Blogger/Blogspot - Changing the Banner

OK. Now my blog really looks like a canned template. Let's try to at least change the banner from the plain colour to the awesome stock photo I downloaded from Stock Exchange. So follow along as I think out loud:
  • First, I need to crop the photo to the dimensions I want: 1000px by 300px. So I did that with my photo editor.
  • Now, I need a place to host my photo. I'll use the same place where blogger puts all my photos for my blog posts - Picasa Web.
  • Once in Picasa, I add the photo to the e.Guidebook album. Once uploaded, I view it and right click on the photo to obtain the URL for the photo.

Once you have that, simply replace the Blog Header section:
/* Blog Header
----------------------------------------------- */
#header-wrapper {
background:$titleBgColor;
margin-top:0px;
margin-$endSide:0;
margin-bottom:0;
margin-$startSide:0;
padding-top:0;
padding-$endSide:0;
padding-bottom:0;
padding-$startSide:0;
color:$titleTextColor;

}
#header {
padding:0; margin: 0;
height: 300px; width: 1000px;
background: url('PUT YOUR IMAGE URL HERE') no-repeat left top;
}
#header h1 {
margin:0;
padding:90px 500px 30px 30px;
line-height:1.2em;
font: $pageTitleFont;
}
#header a,
#header a:visited {
text-decoration:none;
color: $titleTextColor;
}
#header .description {
margin:0;
padding: 5px 500px 10px 30px;
line-height:1.5em;
font: $descriptionFont;
}


Then we need to change the color of the title. This is stored in a variable called titleTextColor. I replaced it with a dark gray but you can choose your own color:

variable name="titleTextColor" description="Blog Title Color" type="color"
default="#fff" value="#333333"

Customizing Blogger/Blogspot - Your Own Template

Now that we know what you want your blog to look like, we can start working on the Blogger template. For the benefit of readers just picking up on this series, we are trying to personalize the look of the e.Guidebook blog. Here's a before/after visualization:


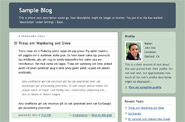
To make things easier for myself, I will modify an existing template rather than creating one from scratch. From the Layout tab, click on Pick New Template. Choose a template that matches your desired layout most closely. For me, I'm going with Minima which looks like this:


Now, the dimensions of this layout isn't quite what I visualized. I wanted a center panel that was 1000 pixels (px) wide. Minima is 740px. So let's change that.
  • From the Layout tab, click on Edit HTML. Yes. I am going to edit the code. Don't be scared. If anything goes wrong, I can always go back and pick Minima and join the all-look-same crowd.
  • Now, I'll copy all the code in the text box and paste it into Notepad so I have a working copy of the code. Need to remember to save this file frequently.
  • Oh good, the code looks very tidy. I like Minima.
  • Now, to change the width to 1000px. I change the part of the code called #outer-wrapper:
#outer-wrapper {
width:740px;
width:1000px;
margin:0 auto;
text-align:$startSide;
font: $bodyFont;
}


Hmm... it looks terrible. Let's widen the other 2 panels as well. I want the blog content panel to be 700px wide and the widgets panel to be 300px. Change the widths of the following sections of code:
#main-wrap1 {
width:700px;
float:$startSide;
background:$mainBgColor
url("http://www1.blogblog.com/rounders/corners_main_bot.gif") no-repeat

...
#sidebar-wrap {
width:300px;
float:$endSide;
margin:15px 0 0;
font-size:97%;
line-height:1.5em;
word-wrap: break-word; /* fix for long text breaking sidebar float in IE */
overflow: hidden; /* fix for long non-text content breaking IE sidebar float */
}


OK, now the panels look like they are the right widths, but the blog content isn't using the full width. There are 3 widths to change to fix this. I will use a blog content width of 680px so that there's a 20px margin on the right edge.
#main {
background:url("http://www.blogblog.com/rounders/rails_main.gif")
repeat-y $startSide;
padding:0;
width:680px;
}

.main .widget {
margin-top: 4px;
width: 680px;
padding: 0 13px;
}

.main .Blog {
margin: 0;
padding: 0;
width: 680px;
}


Much better. Let's now get rid of all those rounded corners. Those are actually images strategically positioned. So just look search the code for all instances of ".gif" and you can easily find all the corners. There is a vertical line going down the main section. Those are called rails and they are images too. So as you go through looking for all the GIFs, you can start removing anything that looks like corners and rails. Here's what I found:

#main-wrap1 {
width:700px;
float:$startSide;
background:$mainBgColor url("http://www1.blogblog.com/rounders/corners_main_bot.gif")
no-repeat $startSide bottom
;
margin:15px 0 0;
padding:0 0 10px;
color:$mainTextColor;
font-size:97%;
line-height:1.5em;
word-wrap: break-word; /* fix for long text breaking sidebar float in IE */
overflow: hidden; /* fix for long non-text content breaking IE sidebar float */
}

#main-wrap2 {
float:$startSide;
width:100%;
background:url("http://www1.blogblog.com/rounders/corners_main_top.gif")
no-repeat $startSide top;

padding:10px 0 0;
}
#main {
background:url("http://www.blogblog.com/rounders/rails_main.gif")
repeat-y $startSide;

padding:0;
width:680px;
}

#header-wrapper {
background:$titleBgColor url("http://www2.blogblog.com/rounders/corners_cap_top.gif")
no-repeat $startSide top
;
margin-top:22px;
margin-$endSide:0;
margin-bottom:0;
margin-$startSide:0;
padding-top:8px;
padding-$endSide:0;
padding-bottom:0;
padding-$startSide:0;
color:$titleTextColor;
}

#header {
background:url("http://www.blogblog.com/rounders/corners_cap_bot.gif")
no-repeat $startSide bottom;

padding:0 15px 8px;
}

#sidebartop-wrap {
background:$topSidebarBgColor url("http://www.blogblog.com/rounders/corners_prof_bot.gif")
no-repeat $startSide bottom
;
margin:0px 0px 15px;
padding:0px 0px 10px;
color:$topSidebarTextColor;
}

#sidebartop-wrap2 {
background:url("http://www2.blogblog.com/rounders/corners_prof_top.gif")
no-repeat $startSide top;

padding: 10px 0 0;
margin:0;
border-width:0;
}

#sidebarbottom-wrap1 {
background:$mainBgColor url("http://www.blogblog.com/rounders/corners_side_top.gif")
no-repeat $startSide top
;
margin:0 0 15px;
padding:10px 0 0;
color: $mainTextColor;
}

#sidebarbottom-wrap2 {
background:url("http://www1.blogblog.com/rounders/corners_side_bot.gif")
no-repeat $startSide bottom;

padding:0 0 8px;
}

#footer-wrap2 {
background:$titleBgColor url("http://www2.blogblog.com/rounders/corners_cap_top.gif")
no-repeat $startSide top
;
color:$titleTextColor;
}

#footer {
background:url("http://www.blogblog.com/rounders/corners_cap_bot.gif")
no-repeat $startSide bottom;

padding:8px 15px;
}


Voila! That's good enough for today. Our dimensions are ok save for the header height. We'll work on the header in the next blog.

Customizing Blogger/Blogspot - Introduction & Visualizing

Tonnes of blogs look the same. At time of writing, even this blog suffers from the "all-look-same" problem that comes with choosing from a small set of templates. I want to personalize the look of my blog and I'd love to take you along for the journey so you can do it too.

Recently, I've been experimenting with several different blog engines for my church's use. Along the way, I noticed that Blogger (or Blogspot), is now offering a very flexible way to customize said look & feel.

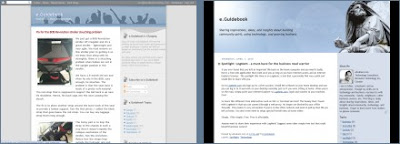
So from a visual perspective, here's what our blog looks like now (left) and my vision of how I want it to look like (right):


Therein lies the first step to customizing. Have a vision for how you would like your blog to look like. Design a layout you like respecting the fact that you still must have an area for blog posts and an area for widgets. Feel free to draw inspiration from other sites. Take a peek inside my thought process:
  • The blog area is way too narrow - I'd like to widen it. I don't want to use the full width of the page because I like the look of "side curtains". So maybe I could expand the content panel from 765 pixels to 1000 pixels and give most of that room to the blog posts.
  • My wife likes blue. A litte bit of a cold colour but tranquil. I think I will use different shades of blue for my site. And I'll use black for the side curtains - makes the page "pop" more.
  • I'd like to have a big banner photo at the top of the page. If only I had some photography skills like Lloyd at Night & Day or Laura Hana, I could take my own photo. Oooh! found a nice free stock photo at Stock Exchange. And it's mainly blue which goes well with my colour scheme.
  • Hmm, I think a 2 column layout like the way I have it now is ok. I still want all the posts to be on the left and all the widgets on the right.
  • Right, now let me mock this up on Corel Photo-Paint (or CorelDraw, or Adobe Illustrator, or Adobe Photoshop, or whatever design tools you prefer). I grew up on Photo-Paint so I'm sticking with what's familiar.
  • Oh yes, I'd like to get rid of that navigation bar/tool bar, if possible.
So go ahead and try it. If you like, post your designs somewhere (flickr, picasa, etc..) and share it with us.

Back Up Your Files

I've seen one too many dead hard drives lately and every time someone loses some really important data. So if you haven't had this happen to you yet, I seriously urge you to *please* backup your data. And by backing up, I don't mean copying it to your flash drive/external hard drive and erasing it off your computer. Your flash drive/external hard drive are just as likely to malfunction as the drive on your computer (some may argue that they are more likely to malfunction).

How do I backup my data?
There are a few good options you can choose from.
  • External hard drive backup solution - some come with backup software that makes it easy for you to pre-configure which folders/files you want to back up and it does so automatically. If you find one that has RAID functionality, I highly recommend that. RAID allows you to mirror your data on 2 drives. Trust me, the data is worth more than the drives so it's worth it for the added peace of mind. Pros: backups are relatively fast. Cons: if your house burns down, your external hard drive typically burns down with it.
  • Online backup solution - there are many online backup solutions available on the market. The one I use is mozy.com and it's pretty easy to use and fairly inexpensive. With this service, your files are typically encrypted and then sent to a data center with proper equipment to keep your data safe. Pros: even if your house burns down, your data is still safe. Cons: typically slow to back up your data as you have to send info over the internet to a data center.
If you choose neither of the above, then at the very least, please make sure your computer is configured to do RAID mirroring.

Is Shopping over Wi-Fi Safe?

It's very commonplace to see Wi-Fi hot spots in airports and coffee shops throughout North America, but it's even more common to see them in our homes. Many Internet providers are now bundling wireless access points with their service. The broadening availability of wireless internet access raises a very good question: Just how safe is it to surf wirelessly?

As you might have guessed, the answer is "it depends". You'll need to understand a little bit more about Wi-Fi to determine when it's safe to make those Paypal purchases over Wi-Fi.

Wi-Fi is intended to be a cordless substitute connection for computer networks to replace physical network cables. But in order to be a good substitute, Wi-Fi needs to provide the same functionality as a regular network cable. You may find some of these functions rather trivial but they cannot be overlooked. The assumption is that if you trust using physical network cables for your online shopping, then if Wi-Fi can provide all of the same functionality, you should be able to trust it as well.

Here are the functions that a regular network cable provides:
  • Signal Connectivity - when you plug a copper wire between computers, you establish an electrical conductive path between them. This path allows the computers to send signals back and forth in the form of electric pulses. Wi-Fi accomplishes this by sending radio waves. Computers can signal to each other using radio signals as a substitute for electric pulses over a wire.
  • Point-to-Point Connectivity - a cable has the property of having 2 ends. That means that signals sent at one end of the cable has only one intended recipient - the other end of the cable. The signal is not easily tapped by a 3rd party because of this property. Radio signals, however, do not have this characteristic. When a machine sends out a radio signal, every other machine within an "ear shot" can "hear" that signal. This is what we call a broadcasting signal. Wi-Fi gets around this by employing an addressing system. Many machines may "hear" the signals, but only one machine that recognizes the destination address as its own identifier will "receive" the signal. The other machines are supposed to ignore the signal based on an honour system.
  • Cross Signal Protection - if you have 2 separate networks, A and B that are connected internally by wires but are not connected to each other, then the communications within network A will never be heard by network B and vice-versa. In Wi-Fi though, this is a problem. Network A and Network B can hear each others conversations as long as they are within "ear-shot". Wi-Fi implements a network identifier called SSID to get around this. In this example, machines in Network A are configured to listen to the SSID of Network A, while Network B machines are configured to listen to the SSID of Network B. Even though machines in Network B may hear signals from machines in Network A, it will ignore them since they are not configured to listen to that SSID. Once again, this is based on an honour system. SSIDs are mandatory for Wi-Fi access points.
  • Access Security - when you plug a wire into a computer, you're only able to do it if you have physical access to the computer and the wire. If you don't have physical access, you won't be able to plug it. In Wi-Fi, access security is implemented using some kind of a password (you'll see it as WEP, PSK, etc. on your wireless access point). This feature is optional in Wi-Fi.
  • Data Transfer Security - To tap the signal from a cable, a deviant literally has to gain physical access to it to make a fork in the cable. Then he/she has to connect the forked cable to a tapping device which can't be too easily done given that you can just follow the wire to find the crook. In Wi-Fi however, tapping is easily done and since addressing is generally done based on an honour system, another mechanism needs to be put in place to ensure that even if the signal is tapped, it is indecipherable. To accomplish this, Wi-Fi employs an encryption mechanism for all transferred data. The password that was used for access security is re-used for this purpose and acts as an encryption key. Encryption works based on probability. The stronger the encryption, the less probable it is for an intruder to decrypt the signals. This feature is optional in Wi-Fi.
So "it depends". As you can see, a couple of the security functions of a physical network cable is only optionally available in Wi-Fi. Unless the password and encryption features are used, Wi-Fi is not a good substitute for physical cables. But if they are used, then Wi-Fi is a decent substitute for physical cables.

Two final caveats...

I mentioned earlier that encryption is based on probability. You may have seen things like 64, 128, or 256 bit encryption. This is a measure of the encryption strength. The higher that number, the less likely it is for anyone to decrypt an encrypted message in their lifetime. That's also the reason why websites ask you to have long passwords. The longer the password, the harder it is to guess.

Lastly, encryption comes with a price. There is a processing overhead with having to encrypt and decrypt signals flying back and forth. So, you will notice that your internet connection runs slower over Wi-Fi when you turn on WEP or PSK. That's a trade-off worth taking.

Retrieving Data from a Dead Hard Drive

From personal experience, there seems to be a lot more faulty hard drives in the last 10 years as compared to the decade before that. In my hometown, to retrieve data forensically from a dead hard drive costs $600 if they don't have to modify the hard drive physically; double that, $1200, if they have to touch one screw on the drive. If forensics is required, the sky is the limit.

In the last 8 years alone, I must've purchased 15 hard drives and about a 3rd of them have kicked the bucket. Brand doesn't seem to make a difference, from what I can tell. No single brand is immune from this trend of increasing hard disk failures. So I tried to figure out, what is it that goes wrong with hard disks these days?

Well, the first type of problem is that files are lost although, perceivably, the drive still works. This usually occurs due to some form of data corruption (could be an OS problem, a disk controller issue, etc.). If this describes your situation, your data is actually quite easily recoverable. However, do not write anything to the disk, do not reformat your disk and do not repartition your disk. Once you write anything to the disk, be it new files, or formatting/partitioning information, that's when you stand to lose your data. There's various data recovery software you can buy that will retrieve this type of data loss. The one I use costs about $100 (diskinternals.com). Works pretty well. I've seen some freeware ones too but haven't tried them.

Then there's the proverbial hard disk "crash". Technically, this means the disk head touches the disk platter. If your disk does indeed crash, you will lose a significant amount of data, if not all of it permanently. But if you look at the specs of a typical hard drive today, most of them can take shocks of up to 3G. That's a lot of force. Dropping your laptop from your desk isn't going to generate 3Gs of force. So what gives?

Typically, we don't actually get a "crash" situation. What's more common is that, the circuit board on the hard drive is damaged (typically from power surges or fluctuations) or one of the motors in the hard drive is dead. I think the former is more common than the latter. You can easily tell if the motor is dead: you don't hear the usual drive spinning up or you don't hear the rattling and buzzing of the disk head's movement.

So how do those forensic data recovery guys fix it? Well, if you don't think you have a motor problem, then buy the exact same hard drive brand new and try to swap the circuit boards with your faulty drive. You'll likely need a torx screwdriver set to do this. Be careful not to damage any connectors to the motors and the drive heads. I have found that you not only need to get the same model hard drive but the same version of the firmware and the board. Hopefully, they are still in the market. If not, then the forensic guys are probably the only way to go.

If you have a motor problem... then you have a problem. You still need to buy an identical unit brand new. This time however, you have to swap the disk platters. This is apparently very risky as disk platters do not like dust, so I'm told. I've never personally done this but every thing I've read stresses that it has to be done in a dust free room. Although, after watching this guy's video, I'm not so sure about the whole dust-free thing.


Opened hard disk in operation

I'm not sure there even is such a room. So in this case, I would probably fork up the $1,200 and get those pros who have access to such a room (that is, if the data is worth that much to me). Here's a video on how the pros do it. Looks like some specialized plastic extraction kit is required.


How the pros remove the platters from the drive

So back to the "crash". When you have a real "crash", your drive typically makes a continuous grinding sound as the head scrapes the surface of the platter.


A Hard Drive "Crash"

The scraped platter is toast but the other platters may still be readable with forensics ($$$).

All this puts an exclamation point on why it's so important to back up your data in multiple places. A UPS (uninterruptable power supply) unit may be a worthwhile investment as they come with voltage regulation and surge protection (external drives are particularly vulnerable to power fluxes). Lastly, buy your hard drives in identical pairs or quads. The data you store is worth way more than storage device. So spend a little more up front and use the disk mirroring feature (RAID).

Safe Transactions over the Internet

In this blog, we will focus on how to keep your data safe while it is traversing back and forth on the Internet. In today's world, your information is what defines your identity. Every company and public agency you deal with, knows you only because you have some kind of information on their records. On the Internet, stealing someone's information with the intent of impersonating that someone is akin to stealing his/her identity.

In the previous blog we talked about protecting data that's on your machine. This blog will cover how to protect data that's in transit on the Internet or stored remotely on another machine not belonging to you.
  • When shopping on the Internet, deal with vendors that do not store your credit card information. This means that you'll have to enter your credit card number each time you purchase - it's a small hassle to keep your data safe.
  • When making any kind of a transaction that pertains to private data (i.e. passwords, banking info, SIN, birthdates, phone numbers), make sure that the site address is using HTTPS (https://...) instead of just http. HTTPS means that the data in transit will be encrypted.
  • Never login to any application through a login form in an e-mail. This is a common strategy to steal your passwords.
  • If you store private information on your PC (photos of your credit cards, SIN card, or a password file), keep it in a password protected file (e.g. password protected ZIP file).
  • If you are using a wireless internet connection (WiFi), turn on data encryption so your data cannot be sniffed over the air. Consult your WiFi router/access point manual for how to turn this on.
  • Also use a MAC address filter. Consult your WiFi router/access point manual for how to use this.
If your data has already been compromised and your identity has been stolen:
  • Reimage your PC
  • Change all your passwords
  • Notify your creditors and suspend all your credit/debit cards
  • Notify Service Canada if your SIN has been stolen

Protecting Your Computer

This blog is about protecting your machine from unauthorized access and protecting your stored data for machines that are connected to the Internet.

Every machine has some kind of software on it that receives access requests from the Internet (called daemons) that put your machine and your data at risk. These come included in the Operating System you run (e.g. Windows, MacOS, Linux, etc.) Straight out of the box, you're already vulnerable. There are a few things you can do right away to mitigate these risks:
  • Use strong passwords for all your users. By strong passwords, we mean at least 7 characters long with a mix of upper case, lower case, symbols and numbers. Try to avoid using words - "admin", "hello" and "password" are terrible passwords.
  • Buy an Internet router with firewall capability. Firewall capabilities are available in just about any consumer Internet router you can buy. Please remember to change the password on the router - default passwords are usually the first things hacked.
  • Keep your operating system software updated with security patches. All the OS vendors find vulnerabilities with their software and continually patch them. It's best to keep up to date with those patches.
That's not all. There are other software that you install on your machine (knowingly or not) that include daemons. So here are some other things you should do to mitigate those risks:
  • Install an anti-virus software
  • Back up your data regularly.
  • Make sure you're installing software from reputable vendors. Usually, if their website has an address (not a PO box), a phone number, a board of directors, you're usually OK.
  • Update your installed software too with patches. Software you install could have daemons as well. That's why it's a good idea to patch these when updates are available.
After you've done all that, there is one weak link that could yet be exploited - the user themselves. Unethical netizens could deceive you to install malicious software on your machine.
  • Buy your software. I've mentioned this in the previous blog and there is good reason for this. If you don't have a legitimate license to run your software, you are probably using cracked software or running some kind of a cracker or key generator. Cracked software, crackers and key generators are usually malicious viruses. You would never have known as it was masked as something useful.
  • Be aware when something is being installed on your computer. When your browser asks you "Do you trust content from XYZ Inc?" it means that it is trying to install software on your machine. If you don't know what that's for, click on "No".
  • Do you open all those email attachments? MS Office documents, VBS, JS, HTML, WMV, can all hold tiny daemons in them. So don't open them unless you know what it is.
If your machine is completely compromised, your only hope left is to reimage your PC, i.e. reinstall everything from scratch. Best to install your PC while it's not connected to the Internet.

Dos and Don'ts on the Internet

In this blog, we discuss the best practices for users to stay safe on the Internet. All Internet users are the participants in a community of netizens. We can each potentially be either a hunter or a prey... neither are good. So at all times, we need to watch that we do not engage in activities that bring harm to others and at the same time protect ourselves from being victimized.

If we genuinely do not wish to harm others on the Internet, we should talk about Internet etiquette (aka. netiquette) . Here are some simple rules of thumb so don't harm others:
  • Don't attempt to hack/crack into machines that you are not authorized to have access to
  • Don't attempt to create virus', trojan horses, worms, spyware, etc.
  • Don't steal - be careful of this. Intellectual property is so often exchanged illegally without knowing. Identities can also be stolen - don't do this.
  • Don't forward group/chain emails that ask you to forward to at least x number of people or as many people as possible - ever wonder why sometimes email takes so long to get to you? This is largely why.
  • Don't send spam.
Here are other rules of thumb to not harm yourself:
  • Steer clear of hate literature/propaganda
  • Be careful of who you interact with on the Internet. Tell your family who you're talking to. Always make sure someone in your family knows if you're meeting an Internet friend for the first time. Better safe than sorry.
  • Be careful of online gambling. It tends to be habit-forming and doing it on borrowed money (like a credit card) is asking for trouble.
This isn't an exhaustive list but it's a starting point. If you can think of more codes of netiquette or how regular people can guard their own psyche to protect themselves from harm, please share in the comments section below.